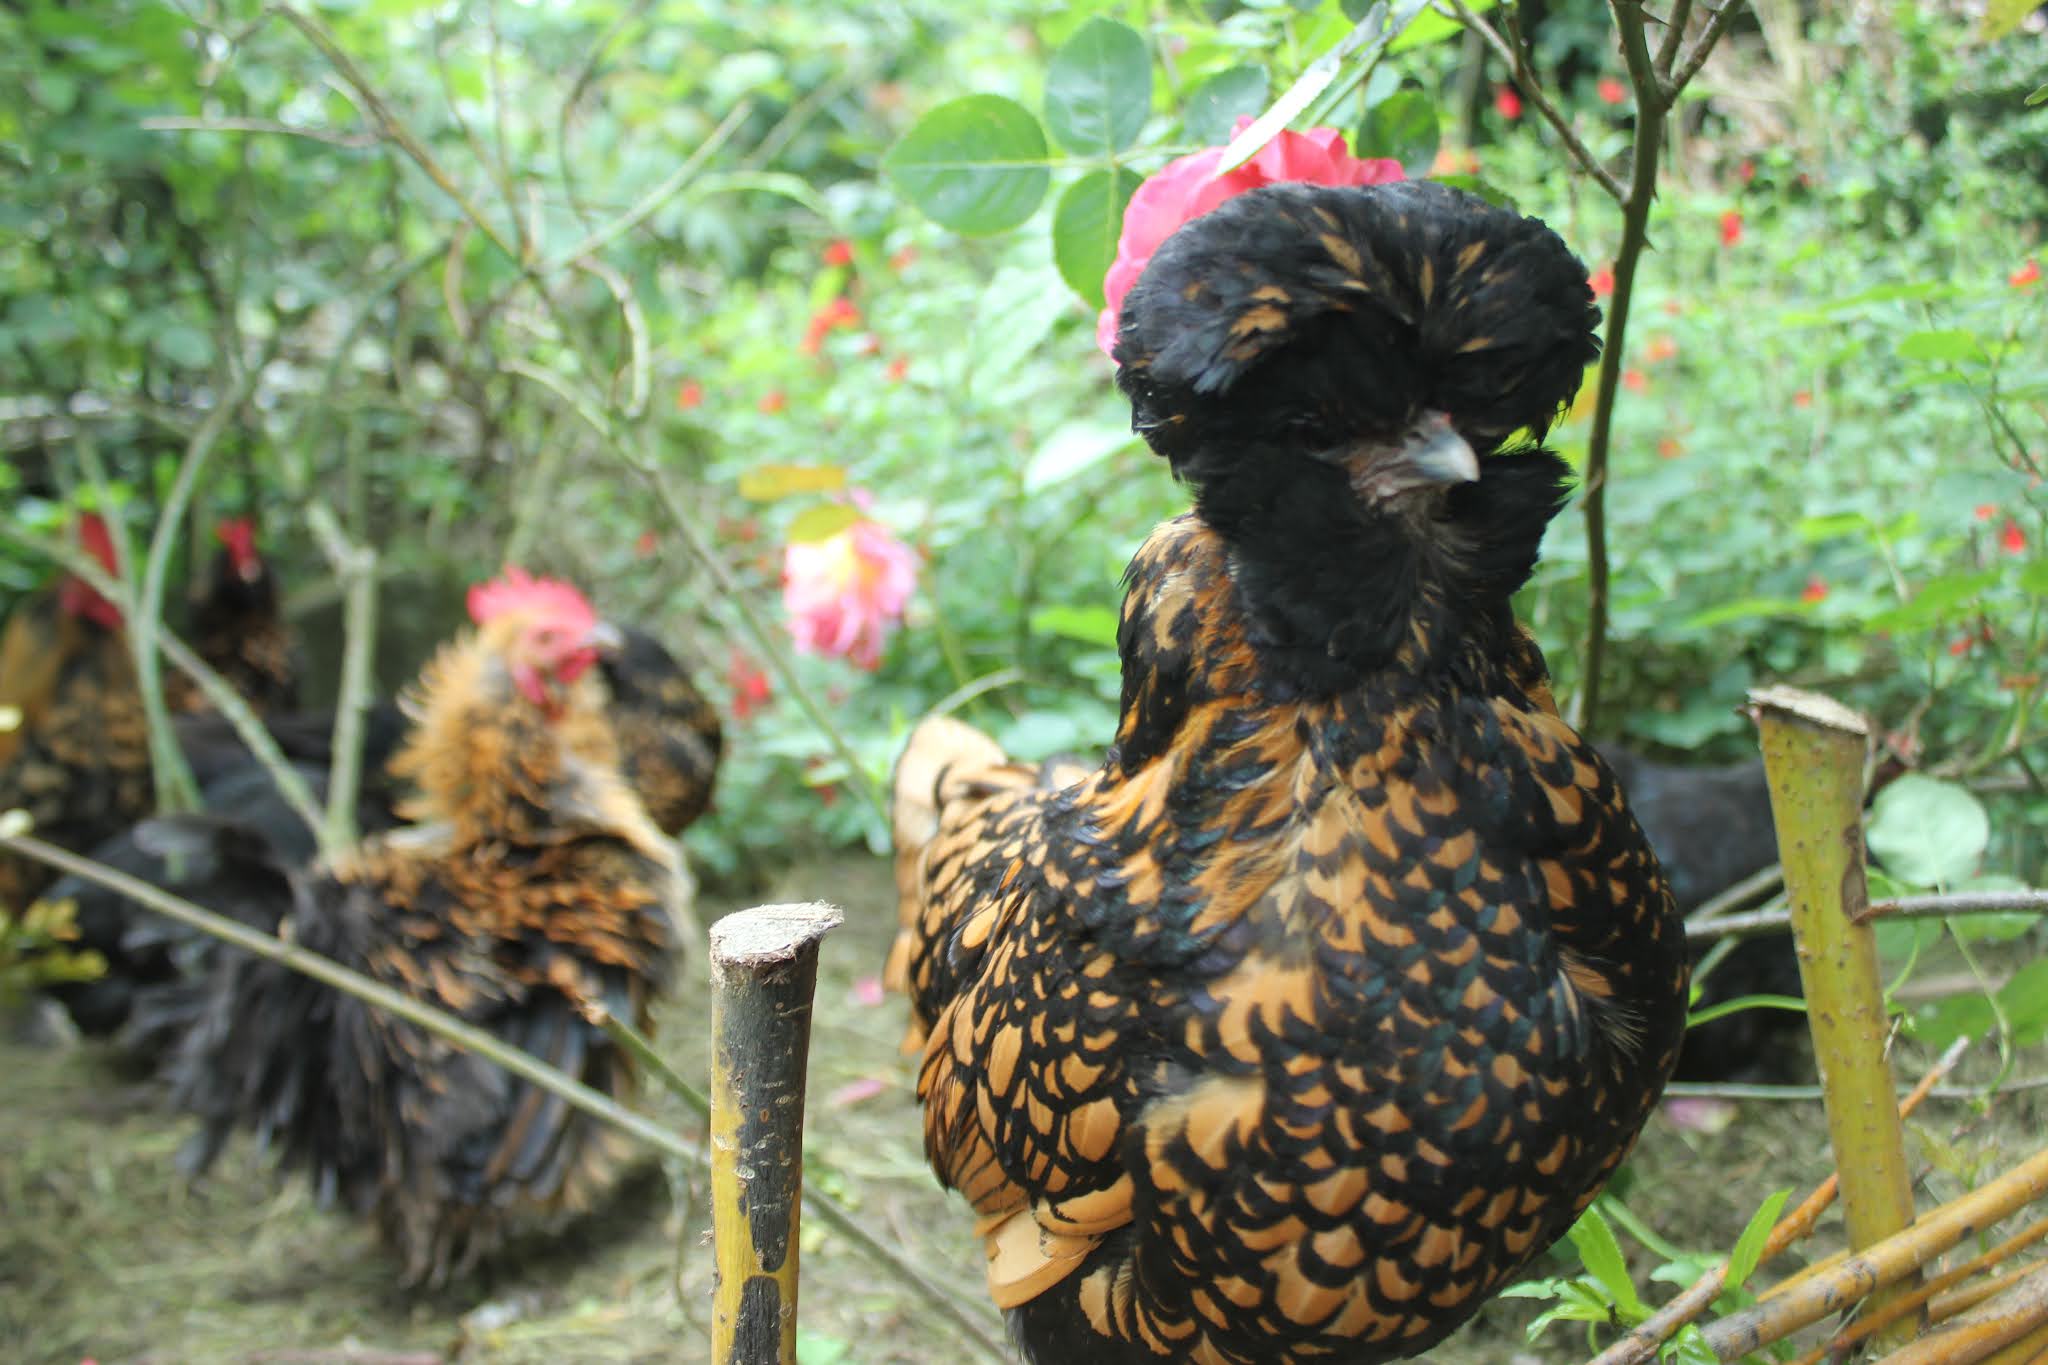
Organically raised chickens, quail, fantail pigeons and the occasional guest poultry all living in 1000m2 of organic forest garden. My articles attempt to look at the poultry's view of life in the backyard and to observe and share how they thrive and survive in the environment we created for them. On the occasions when I need to intervene, I do so with a holistic approach to the bird as an individual and also to infer from the situation what this tells me about the general health, happiness and dynamics of the flock. I also look at stress management and show how to use nutrition and phytotherapy for both prevention and cure of various conditions.
LATEST ARTICLE
Raising Mealworms Organically for Optimum Poultry Protein - Part One - Sourcing/Detoxing & Creating an Environment
Can't wait for a mealworm!
I've always been concerned about the level of protein in the diet of my quail. This is not only from the point of view of egg laying but also and more importantly because from my observation that my quail undergo a complete personality change when they are short of amino acids such as L-methionine. They become fractious and argumentative with each other and shout angrily at me when they see me in the garden. ...read more
Part Two - Optimising the Environment, Population Growth & Grain Mite
As with all my work both writing and films, my intention is to share that observation is key in the understanding of how we can best raise our poultry. This also holds good for how we raise their food. Understanding how invertebrates live, reproduce and interact with their habitat, helps not only in time-saving and avoiding unnecessary labour but also in getting positive results. The first conclusion we came to was that the plastic box was not an optimum environment!......read more
These articles are on-going, they occur either as they happen to us or because someone has asked me for help with their birds and thus to share what I have learned from the experience. Below you will find my my latest YouTube video:
Organic Poultry Food For Free - Creating Leaf Mould
As with all my work both writing and films, my intention is to share that observation is key in the understanding of how we can best raise our poultry. This also holds good for how we raise their food. Understanding how invertebrates live, reproduce and interact with their habitat, helps not only in time-saving and avoiding unnecessary labour but also in getting positive results. The first conclusion we came to was that the plastic box was not an optimum environment!
To this end we decided that creating our own mealworm box, from recuperated wood, could work much better both from a beetle-friendly aspect as well as enabling us to create a moist and yet not overtly damp environment that would encourage mould. This worked so well that the population grew quite quickly and we needed to make several more boxes, as it became quickly apparent that when there are too many invertebrates in one box, the food is speedily consumed and then they start eating each other. Part Two of the mealworm films below shows how we created these boxes. In Part Three you will also see how we modified them to accommodate for the different needs of the larvae and beetles.
Initially we used mosquito netting on the lids to allow a free-flow of air but this unfortunately also allowed mice to freely access the boxes and eat the mealworms! On occasions the netting also permitted both smaller worms and beetles to escape. This latter was not a problem however, as I quickly discovered that, as they were situated in the quail area, which had its own 'forest floor', this actually provided an optimum environment for the escapees. In fact at one point I toyed with the idea of maybe ditching the boxes altogether and just raising them 'in-house' as it were but then I realised that several of my quail have an insatiable appetite for mealworms of all sizes and that they would eat the beetles as well. To this end I replaced the mosquito netting with voile. Stopping the mice however was a problem! Therefore, we stacked the boxes allowing for a tiny air gap and topped this off with a metal ex-radiator grill on the upper box.
I also found that some of the mealworms, often those about to pupate and a proportion of the beetles, were comfortable congregating between layers of brown paper, which I recuperated from our local organic shop.
At this stage I was still unsure about the optimum moisture levels. I'd researched how these creatures lived in the wild and had realised that forest floors, general leaf litter and animal burrows were their native environment. They are however opportunists and will search for food in grain stores and kitchen cupboards, hence the name! It therefore seemed to me that these creatures actually needed quite a reasonable level of moisture in which to thrive but then there was the vexed question of the grain mite.
Using a cheap and cheerful supermarket microscope, it was soon evident that we had a grain mite population.
Acarus siro/Grain Mite Friend or Foe?
Much has been written about grain mites and their problem as a pest in raising mealworms and how necessary it is to keep the environment dry to avoid an infestation. However, I remembered the old adage 'What is sauce for the goose is sauce for the gander.' The fact that moisture and heat, as I found out last year in the Summer heatwave, can have an incredible effect on the prolific growth of invertebrates of all kinds, means that what is best for the grain mite is also best for the mealworm. Furthermore, given the size and the omnivorous diet of the mealworm, grain mites can be seen as just another food source.
Takeaways from Phase Two
As you will see from the film below, I initially despaired of the low number progression of mealworms to beetles to mealworms but once left alone with the requisite amount of vegetable and fruit matter, the population growth was incredible. In essence these are the bullet points:
Mealworms seemed more at home in wooden boxes and the population growth seemed to confirm this
Mealworms hatch out from their eggs, grow and pupate dependent on environmental triggers such as moisture and temperature
Numbers per colony should be kept at an optimum (as per box size) otherwise they may become cannibals!
Because of the above I was very wary of removing any of the bedding materials from the boxes, all I did was create another box and move the population into it
The box, once the mealworms had been moved was left 'empty' or the contents were removed to another recipient and food was added. Over many months mealworms were still hatching out from this substrate and in their hundreds!
A constant 'cleaning out' of the mealworms, as recommended in much of the literature I had read, is a mistake because that way you are certain of losing valuable eggs.
See you in Part Three!
Thanks for dropping by and do feel free to share experiences or ask for further information in the comment section. If you have enjoyed this piece and found it useful think about sharing it with your family and friends, on social media and also maybe about joining this blog and/or subscribing to my Youtube, Odysee or BitChute Channel or even supporting us on Patreon or
It all helps to keep me going!
Until next time, all the very best from sunny Normandie!
I've always been concerned about the level of protein in the diet of my quail. This is not only from the point of view of egg laying but also and more importantly because from my observation that my quail undergo a complete personality change when they are short of amino acids such as L-methionine. They become fractious and argumentative with each other and shout angrily at me when they see me in the garden.
Can't wait for a mealworm!
There is also an established link between L-methionine deficiency and feather pecking, feathers being rich in protein, so if birds can't get it from their food they will consume feathers as an alternative source. L-methionine is absent in grain diets, therefore, if you see your poultry picking up and eating feathers from the ground then this is a good indicator that you need to up invertebrate or animal protein levels.
Behavioural problems with my quail usually happen when we go away because I can not expect my neighbours to be digging for worms or raiding the compost bins for woodlice. At a pinch I could leave them some frozen hard-boiled egg as this year, when we got ourselves really organised and made frozen dinners for all our poultry.
However when in July we came back off our trip to Scotland and my quail greeted me with disdain and all sneered at me as usual, I decided enough was enough and that I should try raising some organic mealworms for them. This was an idea I'd toyed with for some time and I rather launched myself into it rather than actually carry out my usual research methods. In the event I should have followed my instincts and found exactly how mealworms were raised commercially before I just purchased a tin of live bait from the 'hunting, fishing and shooting' aisle in my local big supermarket !
Let me also underline from the outset that information on-line concerning mealworms is contradictory, this includes everything from the life cycle of the invertebrate to its habits and foods. The following is what I garnered from reading but mainly from observation of what worked and what didn't. I also, as with previous articles I've written on poultry and symbiosis, including poultry and their relationship with parasites, began to question the perceived wisdom on the threat or otherwise posed by grain mites.
Problems With Sourcing Mealworms
After I had made my mealworms a home and filled it with the required depth of organic meal, both wheat bran and five cereal and provided them with some cut pieces of fruit and vegetable, I finally sat back and read more around the subject. I already knew how I was going to raise them but on re-reading various accounts and turning up some new ones I was horrified to find that mealworms are raised in much the same way as other creatures in the AgroChemical Industry. In order to make them grow larger and thus appeal to fishermen and at the same time to stop them from pupating, they are fed a diet of hormones. Alarmingly, there is no legal requirement to supply information on the mealworms' diet on the label and therefore, I had no idea about how these mealworms had been raised. Thus, I did what I usually do in such cases, I had the name of the company on the lid of the box, so I rang them up and asked the question. This might seem a really simple thing to do but it's surprising that people often don't think of a direct approach. Even more interesting is that the person I spoke to had no problem in giving me the information. What he told me was that the mealworms were not subjected to hormones but that the bran they were living in was treated with antibiotic and that they had been fed with antibiotics (also a growth promoter by the way).
I was heartened when, once out of the refrigerator, these mealworms not only began to speed up development but they also began to show signs of pupating. Conversely, when at a later date I bought another tub of fishing-bait mealworms from a different sporing goods shop and from another producer, these did not react in the same way. Once warm and fed, all but one of them, after an initial short period of growth, turned black and shriveled up. Thus only one of the worms remained to pupate. These mealworms were much larger than the previous ones and I had toyed with the idea of introducing them to the others to add a different 'bloodline' but obviously, I shelved that idea!
Detoxing Mealworms
After various conversations with organic farming friends, I decided that the antibiotic content of the mealworms should be capable of detox by feeding them an organic diet and by waiting for the second generation of worms. I was told that as the antibiotic feed was, by necessity, a constant in industrially raised mealworms that the residues would be minimal but I still decided to wait until my mealworms had changed to beetles and then produced a new generation of mealworms before I allowed my quail anywhere near them! I also kept them in a container of organic wheat bran before transferring them to their permanent home box, thus allowing them to have a full 24 hours in which to flush the first of the antibiotic residues. There is also the issue of pesticides to consider, as they had been kept in a substrate of non-organic bran!
Initial Conclusions On Mealworms - Home and Environment
As mentioned above and in line with what I had seen in multiple videos and in written articles, I had decided initially to try a conventional approach of raising them in plastic food-grade boxes but obviously on a substrate of organic bran. You can watch my first film (below) on this stage of the experiment to see firsthand how this worked out. In essence though these are the bullet points:
A plastic box is not a good environment for the mealworms, it didn't allow for enough circulation of air and caused issues with the beetles' development.
There was obviously a problem with the bran substrate as the poor development of the beetles' wing cases was eventually diagnosed as an uneven moisture problem in the plastic box. Either too much water causes mold or too little causes the emerging beetle to dry out too quickly.
Like many invertebrates, the life cycle of these creatures is complex.
From an initial few beetles which developed from my fishing-bait mealworms, I had very few mealworms hatch out.
I nearly gave up at this stage but as you will read in Part 2, I persevered and the population grew incredibly over the following months.
Thanks for dropping by and do feel free to share experiences or ask for further information in the comment section. If you have enjoyed this piece and found it useful think about sharing it with your family and friends, on social media and also maybe about joining this blog and/or subscribing to my Youtube, Odysee or BitChute Channel or even supporting us on Patreon or
It all helps to keep me going!
Until next time, all the very best from sunny Normandie!
Raising Mealworms Organically for Optimum Poultry Protein -- Part Two
As with all my work both writing and films, my intention is to share that observation is key in the understanding of how we can best raise our poultry. This also holds good for how we raise...read more
Food for Free. Fabulous Forage Part 1 Grass
For centuries farmers and homesteaders raised poultry on a forage-based diet supplemented only by a handful of grain and the occasional..read more
Food for Free. Fabulous Forage Part 2 Chickweed
Stellaria media an incredible food and medicinal for poultry, an in-depth look at this ubiquitous weed..read more
Food for Free. Fabulous Forage Part 3 Tree Fodder & Tree Hay
The idea of tree fodder is inextricably linked with the changing landscape, the full domestication of animals, the concept of farming and the clearance of the forests... read more
Food for Free. Fabulous Forage Part 4 Roses for Food & Forest
For me the rose is the quintessential forest garden plant, from canopy to ground cover there are so many to choose from ... read more
Food for Free. Fabulous Forage Part 5 Rose Petals
One of the main roses I use for both cooking, medicinals and which my hens very much enjoy is, not surprisingly, rosa gallica Officinalis, or The Apothecary Rose... read more
Food for Free Fabulous Forage Part 6 Rose Leaves and Hips
For thousands of years the rose, hips, leaves and blossoms have been used as medicinals for both physical and nervous system ailments. .....read more
Food for Free Fabulous Forage Part 7 Hips/Leaves Why?
Part 6 dealt in detail with the nutrient value and here we look in depth at why these are crucial for optimal physical and nervous system health...read more
Food For Free Fabulous Forage Part 8 Air Meadows for Poultry & Livestock
'Air meadows' is the beautiful description for a multi millennial old tradition of feeding European livestock. The standard way of growing trees for...read more
Food For Free Fabulous Forage Part 9 Tree Choices Poultry & Livestock
Depending on your climate and native (or well-established) species of trees there are so many options to choose from when planning to grow these valuable forage crops...read more
To complete our quail safe area and to create a more varied and interesting terrain, I decided to experiment with all sorts of vegetation. some of which I had already used successfully in other quail areas. I wanted something which could not only speedily provide our quail with good cover and nesting sites but which also would provide an evolving habitat and a continuous food supply. I also complemented my ideas with reading about the wild habitats and the sorts of vegetation amongst which quail can be found in Nature.
Preparation
To create an initial and nutrient rich base for my plantings, I carried in several loads of compost, which the quail were more than happy to help me spread and incorporate into the soil. They simultaneously helped clear up as many invertebrates as possible too, although I was hoping that some of the latter would survive to reproduce.
I also set up a small pile of compost within a simple wooden framework, the quail's own basic compost bin! This is a great ant environment and the quail's favourite food are ant eggs particularly those of the flying ants which are large and a dusky pink and obviously highly prized (see below). However, Quail also love eating the ants as well! One of the marvelous ways in which quail help in the garden is that they will eat slugs, many chickens don't unless they have been trained up to do so as chicks by their mother. Therefore, the delicate-leaved plants in the quail safe area don't get the slug problems most thickly planted areas are subjected to.
Quail Appreciate Aromatics
Going on previous experiences with quail nesting, their favourite nest sites seem to be under aromatic plants, so my first plantings were of a large rosemary (Salvia rosmarinus) cutting and a lemon balm (Melissa officinalis), quail will eat the latter, so it's worth planting quite a large root of it with well-advanced foliage.
In the past few years we have also been growing the sage (Salvia officinalis) we use in our home-made toothpaste and I planted that in the quail run too. They love sitting amongst its leaves and they don't eat them, so that is another plus! Another wonderful aromatic shrub, also in the salvia family is (Salvia microphylla) aka the black currant sage and has very aromatic leaves. I do wonder if part of the quail's love of strongly scented plants is that quail are thought to be quite specific in their own smell and this is what is thought to make them easily identifiable to predators. A brooding quail is therefore a 'sitting duck' to rats and other nocturnal opportunists and so maybe their love of scented plants has a practical angle of camouflage. Sage shrubs come in many different colours such as that opposite known as 'Hot Lips' and are easy to grow from cuttings so they add scent and beauty to the quail area.
Plant More
Conversely, I also planted a goji cutting in there too but that gets the leaves stripped off at quail-high, so I have to make sure as it grows as a lax shrub, it's staked up and out of their reach. As with everything in this garden though I find that planting a largish amount of any item means that there is fair shares for all and the way in which they strip the goji of leaves convinces me they either love it and/or need it in their diet.
Upcycling To Save Money and Time & Using All Available Space
As mentioned in the film I planted up several different vegetables, which had come in the 'chicken boxes', I get from my local organic shop. This is the damaged fruit and vegetables that can't be sold but what can't be eaten can usually be re planted. Quail aren't that keen on carrot tops, so I planted a fair few whole carrots, which also went on to produce very pretty flowers. The turnips and the salsify I planted were constantly nibbled but I managed to get some going in pots first and then they stood a better chance. I also planted some succulents in hanging planters and a large edible passion flower that I had grown from seed. Quail like cover but also planting quite thickly in certain areas, gives the illusion of more space and allows them to make territories. These plants also of course attract insect life and I did plant brassicas because the quail love cabbage white caterpillars, they chase the butterflies too.
Practical And Pretty
I believe garden areas should be aesthetically pleasing too, so I planted a rose, passion flower as well as a sturdy yucca within the quail area and I potted up and boxed up delicate flowering plants, which I new they would damage by digging into the roots if allowed too! This meant they had the advantaged of a well-planted area above quail height.
I also used my quail space as an over-spill from our other greenhouse and planted some tomatoes in pots with wooden trellis to hold the leaves above quail height as they will nibble at them!
One word of caution, I leave my wooden box containers open at the bottom to allow for better root growth and to keep them from drying out but this also can allow access for rodents to propagate, mice don't bother me but I did have occasion to leave the connecting door open between the safe area and the lower-greenhouse and a rat got in and started a nest in the box! Luckily I worked this out pretty quickly and evicted her!
Repurposing
One of the only places that still seems to have wild quail locally is an organic dairy farm and I also know from experience how happy my quail were free-ranging with their mother hen in the old traditional meadow next to our home. So when a friend asked us to help out with her garden - it seemed like an ideal opportunity to get some tufts of ready-made meadow. One woman's weeds are other people's plants. Our task being to clear an area of meadow for new vegetable gardens. Not only did I take a pair of quail to help clear wire worms, etc., but I also got to take the clods of soil and vegetation home for the rest of the quail to sift though and for replanting
Quail and Toxicity
Another plant I used which was both very pretty and perfumed was the large decorative tobacco - nicotiana sylvestris. This is an architectural plant used in many parks at the back of borders and also very useful in shady and woodland gardens. They are also very useful in greenhouses as their perfume attracts insects including night pollinators such as moths. Tobacco plants belong to the Solanaceae aka nightshade family and as such all parts of the plant contain toxic alkaloids in varying amounts and degrees dependent on variety. This ranges from toxic to mildly irritant and it is the the latter category of which sylvestris is said to belong to. The flowers of sylvestris are headily fragrant but the leaves and stems exude a rather acrid scent and a sticky fluid, which coupled with the 'furriness' of the leaves should be off-putting. However, quail do nibble at them and it should be further noted that quail can consume toxic substances without ill-effect to themselves. Hence 'coturnism', which is a condition mostly experienced by hunters consuming migratory quail which have, due to the conditions of their journey, sometimes consumed toxic plants. When choosing plants for a quail area, it should therefore be a consideration that any that are toxic to humans may not be so to quail and these poisons may potentially end up in their eggs. However, as with all things commonsense should prevail, as should personal research and with many plants it is about dosage. Many birds and animals use medicinal plants which are also often toxic to self-medicate, particularly for internal parasites.
What About the Winter?
When the foliage dies back in the Winter then the aromatic shrubs such as lavender, thyme and sage come into their own as they do not shed their leaves, which is yet another reason for planting them. However, leaves per se collected from a local forest or from the garden provide a beautiful and practical forest floor for the quail. Eventually these will break down, adding to the soil structure and providing a habitat that encourages invertebrates. I also bring in pieces of bark and moss, which provide further interest and nutrition for the quail.
Housing?
Although for most of the year our quail prefer to dig little forms and sleep out in the safe area, I've noticed that with the change in temperature the bonded pairs and the remainder single quail will interlock wings at night. With the pairs I believe this is part of their show of affection for each other but I also believe they and the singles do this because of the need to keep warm. To this end I did create a small wooden house and as the temperature dropped even further, I noticed they went into it after their evening meal and interlocked wings once inside. Depending on your Winter temperature you should consider what sleeping accommodation you might need but as a warning do watch out for a build up within the fabric of the house of red mite , which I know to my cost if undetected and thus allowed to proliferate, can be fatal to quail. As with anything with keeping birds or animals, observation is key and noticing how and if behaviour changes with the seasons will help you to decide how and if you need to add extra material in the way of leaves or straw or additional enclosed accommodation.
Thanks
for dropping by and do feel free to share experiences or ask for
further information in the comment section. If you have enjoyed this
piece and found it
useful think about sharing it with your family and friends, on social
media and also maybe about joining this blog
and/or subscribing to my Youtube, Odysee or BitChute Channel or even supporting us on
Patreon or
It all helps to keep me going!
Until next time, all the very best from sunny Normandie!
Creating A Safe Quail Area Part 1 Design & Materials
Once my quail started to pair bond and create designated nesting sites, I realised that, any interference on my part, such as putting them away at night, or covering the nests, interfered with..read more
Creating A Safe Quail Area Part 2 - The Build
A detailed, step-by-step account of the making of the safe quail area, with photos, tips and strategies for a trouble free build..read more
Raising Mealworms Organically for Optimum Poultry Protein - Part One
I've always been concerned about the level of protein in the diet of my quail. This is not only from the point of view of egg laying but also and more importantly because..read more
Many nutritional deficiencies in chicks are in fact due to gaps in parental diet, which impact directly upon the quality of the embryo's nutrition and do therefore start within the shell. It is of tantamount importance therefore when raising quail to remember that the food quality, stress levels and general well-being of your adult quail impact directly on that of any potential chicks.
See Above: One of my favourite options for quail and so easy to obtain, because they are so prolific, is a nest of ants, if possible complete with eggs. Here is one of my quail enjoying a feast of the same, including the much prized flying-ant eggs.
In order to fill in any gaps afforded by seasonal lack of wild invertebrates, I also find that raising mealworms is an excellent option.
What, Why & When?
In my experience, problems can occur with purchased hatching eggs, where I have no knowledge of what the adults have been fed. For example, chronic deficiency, particularly of the water-soluble B Complex Vitamins, selenium and L-methionine has often been my experience in quail chicks, where due to lack of available eggs, I have been forced to buy from large industrial hatcheries. One of the major problems with deficiency in quail however, as with humans, is that the body is such a superb machine that it can carry on functioning even with insufficient 'fuel'. Thus the effects of deficiency can build up in the body without symptoms until the final and catastrophic failure. My position is that if we know what to look for and/or what to expect then we can avoid arriving at this point and having to subject both ourselves and our quail to the stress and often the trauma that accompanies it. No one enjoys being ill and a previously happy and active quail suddenly disabled by paralysis, lack of vision, unable to eat or drink etc.,. is no exception.
What I learned about deficiency by raising quail
It is sadly a reflection of human appreciation of the critical importance of their own food intake that makes it difficult for them to recognise how important food is in the diet of their poultry and how speedily debilitating and in fact fatal such deficiencies can become. As an aside, everything I learned by observing quail chicks aided me in the resolution of an undiagnosed and almost fatal condition in my father, which turned out to be (among other nutritional and toxicity issues) mainly chronic B12 (cobalamin) deficiency.
At the crux of the problem for quail is that most commercial quail eggs are usually destined to become sedentary,
cage-confined birds, fed on pelleted food with the required but often synthetic trace elements. Once hatched with me or similar non-cage raisers, these chicks find themselves with plenty of
room to expend energy and are allowed to forage and find their own food. Whilst expending initial energy at this rate they are subject to deficiency because their intake of essential nutrient is not just covering usual necessity but also trying to fill the gaps left by the content of the egg. The trick is to know what to look for and catch the condition quickly
with additional individual hand-feeding of these key nutrients. Quail are precocial and incredible speedy and energetic birds almost from day one of hatch. It is an absolute joy to see them both as adults and chicks come out every morning with a hop, skip and a jump and often have a vertical take off flutter, seeming for the sheer joy of living. It is thus very important to identify any problems which are causing them to be unusually lethargic and sedentary.
Such was the case above, wherein this little quail seemed to be spending too much time sitting whereas his brothers and sisters (pictured above him) were busy foraging. The day after this picture was taken this little chick developed a slight
limp which sounded the alarm bells for me as the onset of
curled toe paralysis (Vitamin B₂ Riboflavin deficiency live link to my article). A nutritional
supplement of organic yeast flakes, Brazil nut and wild invertebrates and he was
quickly back on his feet. In recent years I have also been able to obtain organic beef liver, which is an excellent source of so many essential nutrients that can be deficient in quail. Liver is one of nature's most concentrated sources of Vitamin A and although this vitamin can be obtained from plant sources, its precursor being beta-carotene from brightly coloured fruit and vegetables, the conversion process is dependent on the body already containing sufficient fat. On a grain diet one of the major vitamin deficiencies can be that of Vitamin E. Furthermore as not every human is genetically able to convert beta-carotene to Vitamin A, I'm one of them, there is no reason for me to think that every bird can either. Vitamin A is also responsible for the assimilation of proteins, minerals and water soluble vitamins. As liver contains a whole panoply of these, you are getting a great all in one package deal when you feed it including, apart from Vitamin A:
Vitamins D, E, K₂, and the B complex vitamins (including the big DNA hitters B₁₂ Cobalamin and Vitamin B₉ Folate)
Omega-3 fats
Trace minerals like copper, zinc, iron and chromium
Coenzyme Q10 (CoQ10) which is an antioxidant with the ability to protect the cells from the damage of oxidative stress, which is one of the major risk factors for neurogenerative conditions.
Purines - needed for cell function; to produce energy and molecular synthesis
Having a supply of raw organic beef liver is something I have in stock, we eat it and I buy it and freeze it. We and our poultry are on a 100% organic diet but if you are not, then at least the liver you feed must be organic because this organ is both a big storage unit and an integral part of the waste system. Thus, the panoply of pesticides, antibiotic residues et al, which are the stock-in-trade of the conventional farmer, pass through it and are stored there, making non-organic offal a nightmare. Organic beef liver is not expensive, the taste is strong and most of my friends here turn their noses up at. For my quail I often serve it up in water or mixed with some scrambled egg.
Even if you have to pay more than my 3 Euros a kilo, to my mind it is a very cheap cure-all. If you do not have access to organic liver then use one of your own organic eggs, hard boiled, which is also a fantastic medicinal though less nutrient-rich per serving than liver!
With quail, because of their high basal
metabolism, certain nutritional deficiencies, such as those associated with curled toe paralysis are quick to manifest themselves,
thus easy to spot if you know what to look for and curable often within
less than 24 hours! Another nervous system condition, however, this time known as 'Star Gazing' is caused by a deficiency primarily in thiamine (B₁) has a slower onset but to avoid this, a simple inclusion of sunflower seeds, which are rich in this vitamin, can be included in the diet. Remember all these foods should be organically grown, otherwise you risk the inclusion of pesticide residues, which in turn as toxins will inhibit the uptake of mineral and vitamins, apart from causing harm in themselves! There will be an article on B₁ deficiency and 'Star Gazing' coming shortly to this site!
Here's a sobering thought that can be applied to human health too and although I've already outlined this in my article on Torticollis but it's worth repeating deficiency in any of the 13 vitamins listed below can induce neurological illness. The full list is as follows:
Vitamin A
Vitamin B₁ Thiamine
Vitamin B₂ Riboflavin
Vitamin B₃ Niacin
Vitamin B₅ Pantothenic Acid
Vitamin B₆ Pyridoxal-5-Phosphate
Vitamin B₇ Biotin
Vitamin B₉ Folate
Vitamin B₁₂ Cobalamin
Vitamin C
Choline (mineral/vitamin often grouped with the B complex vitamins)
Vitamin D₃
Vitamin E
These particular vitamins are only part of the story, minerals which are are not only useful in themselves act as transporters for the vitamins. This function of an individual or group of minerals assures that the vitamin is driven to the correct location where it can be assimilated and put to use. Similarly the mineral intake of a bird can be rendered useless or even worse actually dangerous, I'm thinking of calcium here in particular, which can cause heart conditions in hens, if not accompanied by certain vitamins and taken in in the correct balance with other minerals. In the case of Vitamin A, for example, zinc is necessary to get it moved to where it can do most good. It is also only part of the deficiency story too, as many vitamins, minerals and other foodstuffs must work in synergy and we will look at this incredibly important issue in the next article.
The bottom line however, is that your bird when given a choice of foodstuffs or even better left to forage in a large space or supervised free-ranging, knows more about its optimum diet than we humans ever will. Certain elements that the bird consumes to maintain a healthy gut are not even edible, so not something we may even be familiar with even as a concept. However, the above article will serve hopefully to aid you to remedy conditions caused by insufficient diets in the past life of your quail or that of its parent.
Thanks for dropping by and do feel free to share experiences or ask for further information in the comment section. If you have enjoyed this piece and found it useful think about sharing it with your family and friends, on social media and also maybe about joining this blog and/or subscribing to my Youtube, Odysee or BitChute Channel or even supporting us on Patreon or
It all helps to keep me going!
Until next time, all the very best from sunny Normandie!
Pain Surprise is an elegant way of serving a selection of sandwiches, usually at weddings, picnics and parties, wherein the loaf itself becomes the presentation dish. On the table, the bread looks quite ordinary but then the lid of the loaf is lifted to reveal the 'surprise' within, dainty triangles of delicious sandwiches. However, in this version the 'surprise' has something a little extra and is strictly for the birds.
I've been raising organic mealworms for some years, mainly for our quail. This year I have had a bumper amount of mealworms hatching and pupating due to the continuous hot Summer weather, so they are in need of a new home.
Lately I've been giving the worms some stale bread crust, which they really enjoy but I also realised how spooky the crusts looked as the mealworms hollowed them out. I even found some of the mealworms had tunnelled out little 'nests' within the crusts in which to pupate. Then I was given some organic bread flour to make loaves for my chickens from friends who also, on account of the very warm Summer, have had big problems with mites in their shop. The photo on the left shows an example of the Indian meal mite lava found in the bag of flour I used for this loaf.
The organic linseed was provided by the same source and for the same reason - although our mealworms are not that keen on linseed but I thought it looked more festive.
I foraged the moss from our local forest and the carrots were rejects, again from the organic shop.
The total cost of this project was $3 for the second-hand aquarium.
Ingredients
8 cups - 1 kilo - 2lbs whole-wheat flour
2 teaspoons of quick yeast
2½ cups - 600ml - 1 pint+ of luke warm water (you may need a little more or less water depending on your flour)
Seeds - I used a handful of linseed
Butter/fat for greasing tin
Choice of sandwich fillings - I chose traditional green and orange.
Your choice of creepy crawlies.
Ribbon and optional decorations - I used a brooch and a piece of black hat veiling.
Equipment
Mixing bowl (pre-warmed)
Damp dish/glass cloth
Round loaf/cake tin 9" - 22cm diameter and 4" - 10cm deep
Slightly larger tin or pan
Sharp bread knife
Shallow bowl for rolling loaf in seeds
Aquarium (I got one at a secondhand shop for $3). This is optional but if you are putting your Pain Surprise on an actual dinner table then it could a good idea!
Making the Loaf
Sieve the flour into a pre-warmed mixing bowl.
Add the yeast and mix well into the flour.
Add the water slowly, mixing as you go - flours differ and some need more or less water than others.
Knead dough for between 5 to 10 minutes, until it is smooth and elastic.
Shape into a ball and place into the lightly greased mixing bowl.
Place in a warm area, cover with a damp cloth and leave to rise until it has doubled in volume.
Prepare the cake/loaf tin by lightly greasing with butter or fat.
Punch back the dough and knead for a few minutes.
Shape it into a loaf using the tin as a guide to size.
Sprinkle a handful of seeds into a shallow bowl and then place the dough, crust-side down into the seeds. Then using your hands, pat some seeds up onto the sides of the loaf.
Place loaf in the tin.
Score the top of the loaf with a sharp knife.
Leave in a warm place to rise to the top of the tin (30 to 40 minutes)
In the meantime preheat oven to 400ºF or 200ºC.
Bake until the loaf freely leaves the sides of the tin, when turned upside down. This is approximately after 30 to 40 minutes in the oven.
As an extra check, tap the base of the loaf with the knuckles. If there is a hollow sound, then the loaf is baked.
Place right side up on a cooling rack.
Preparing the Loaf
When the bread has completely cooled, place it in a slightly larger tin. This tin will be used to both prevent the seeds being disturbed on the sides of the loaf and also to maintain the crust at a high enough level to cut off the 'lid'.
Using the rim of the tin as a support for your knife, gently remove the top crust.
Wholemeal bread is quite crumbly, so go slowly when you remove the crust and also make sure your knife is very sharp.
Place your lid to one side on a drying rack and place the rest of your loaf on another rack. Leave to dry.
The object now is to remove the whole of the inner cylinder of bread aka crumb, whilst leaving the base and side crusts intact.
When your loaf is dry to the touch, take a sharp knife and make an incision all the way down and around the loaf 'crumb' at ½ " or 1cm from the side, making sure not to pierce the bottom crust of the loaf.
Pierce the crust with a sharp thin knife, at ½ " or 1cm from the bottom of the loaf, making an incision wide enough to take your bread knife. Insert the bread knife and carefully, with a sawing motion, angle the knife through the incision to slice through and along the bottom of the loaf, making sure not to pierce the crust nor make the original incision any larger. You may need to reverse the knife to cut out an exact circle. Or you could make two incisions and cut both ways to avoid leaving some of the crumb behind.
Use your fingers to remove the bread cylinder aka crumb.
Place the crumb in the freezer - this will make it much easier to slice.
Making the Sandwiches
Remove the crumb from the freezer.
Using a sharp knife and with the crumb placed on its side, carefully split it into an even number of slices.
You can make these as thin or as thick as you like. Thicker is easier! You may even find it simpler, depending on the depth of the crumb to make just one row of sandwiches - doorstops as they are called where I come from.
Make your sandwiches from your filling and two rounds of bread - my fillings are green and orange - traditional Halloween colours.
Cut each round of sandwiches into triangles.
If your bread is really crumbly, then an alternative way is to cut the sandwich triangles first and then split them afterwards.
Pain Surprise
Place the first circle of sandwiches slightly at an angle back into the crust container, so that the filling is showing.
Add the creepy ingredient.
Continue onto the next layer, sandwiches and crawlies, until the Pain Surprise is full.
Place the crust lid on top and tie with a ribbon.
Add Halloween decoration.
Prepare a few days in advance for a better effect at the reveal.
Place the Pain Surprise in an aquarium or similar glass bowl with a lid so as to avoid any escapes.
Thanks for dropping by and do feel free to share experiences or ask for further information in the comment section. If you have enjoyed this piece and found it useful think about sharing it with your family and friends, on social media and also maybe about joining this blog and/or subscribing to my Youtube, Odysee or BitChute Channel or even supporting us on Patreon or
It all helps to keep me going!
Until next time, all the very best from sunny Normandie!


