Showing posts with label organically raised quail. Show all posts

Perfectly Horrid Halloween Pain Surprise - Creepy Crawly Decorative Centrepiece

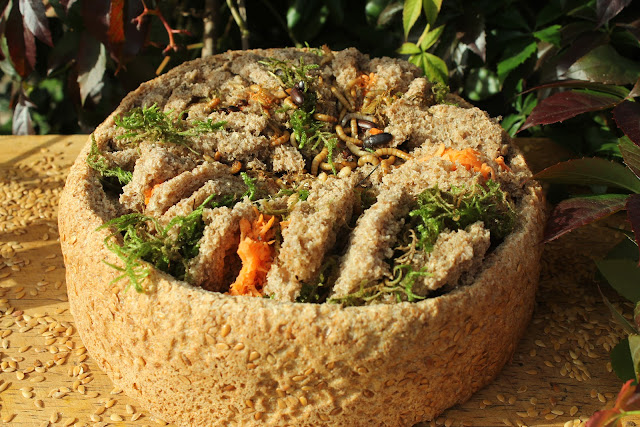
Pain Surprise is an elegant way of serving a selection of sandwiches, usually at weddings, picnics and parties, wherein the loaf itself becomes the presentation dish. On the table, the bread looks quite ordinary but then the lid of the loaf is lifted to reveal the 'surprise' within, dainty triangles of delicious sandwiches. However, in this version the 'surprise' has something a little extra and is strictly for the birds.

pain surprise sandwiches Halloween style

I've been raising organic mealworms for some years, mainly for our quail. This year I have had a bumper amount of mealworms hatching and pupating due to the continuous hot Summer weather, so they are in need of a new home.

Indian meal mite lava
Lately I've been giving the worms some stale bread crust, which they really enjoy but I also realised how spooky the crusts looked as the mealworms hollowed them out. I even found some of the mealworms had tunnelled out little 'nests' within the crusts in which to pupate. Then I was given some organic bread flour to make loaves for my chickens from friends who also, on account of the very warm Summer, have had big problems with mites in their shop. The photo on the left shows an example of the Indian meal mite lava found in the bag of flour I used for this loaf.

The organic linseed was provided by the same source and for the same reason - although our mealworms are not that keen on linseed but I thought it looked more festive.

I foraged the moss from our local forest and the carrots were rejects, again from the organic shop.

The total cost of this project was $3 for the second-hand aquarium.


Ingredients

8 cups - 1 kilo - 2lbs whole-wheat flour

2 teaspoons of quick yeast

2½ cups - 600ml - 1 pint+ of luke warm water (you may need a little more or less water depending on your flour)

Seeds - I used a handful of linseed

Butter/fat for greasing tin

Choice of sandwich fillings - I chose traditional green and orange.

Your choice of creepy crawlies.

Ribbon and optional decorations - I used a brooch and a piece of black hat veiling.


Equipment

Mixing bowl (pre-warmed)

Damp dish/glass cloth

Round loaf/cake tin 9" - 22cm diameter and 4" - 10cm deep

Slightly larger tin or pan

Sharp bread knife

Shallow bowl for rolling loaf in seeds

Aquarium (I got one at a secondhand shop for $3). This is optional but if you are putting your Pain Surprise on an actual dinner table then it could a good idea!


Making the Loaf

loaf for pain surprise


Sieve the flour into a pre-warmed mixing bowl.

Add the yeast and mix well into the flour.

Add the water slowly, mixing as you go - flours differ and some need more or less water than others.

Knead dough for between 5 to 10 minutes, until it is smooth and elastic.

Shape into a ball and place into the lightly greased mixing bowl.

Pain surprise Halloween style


Place in a warm area, cover with a damp cloth and leave to rise until it has doubled in volume.

Prepare the cake/loaf tin by lightly greasing with butter or fat.

Punch back the dough and knead for a few minutes.

Shape it into a loaf using the tin as a guide to size.

Sprinkle a handful of seeds into a shallow bowl and then place the dough, crust-side down into the seeds. Then using your hands, pat some seeds up onto the sides of the loaf.

Place loaf in the tin.

Score the top of the loaf with a sharp knife.

Leave in a warm place to rise to the top of the tin (30 to 40 minutes)

In the meantime preheat oven to 400ºF or 200ºC.

Bake until the loaf freely leaves the sides of the tin, when turned upside down. This is approximately after 30 to 40 minutes in the oven.

As an extra check, tap the base of the loaf with the knuckles. If there is a hollow sound, then the loaf is baked.

Place right side up on a cooling rack.


Preparing the Loaf

Pain surprise preparing the loaf


When the bread has completely cooled, place it in a slightly larger tin. This tin will be used to both prevent the seeds being disturbed on the sides of the loaf and also to maintain the crust at a high enough level to cut off the 'lid'.

Pain surprise cutting the crust


Using the rim of the tin as a support for your knife, gently remove the top crust.

Wholemeal bread is quite crumbly, so go slowly when you remove the crust and also make sure your knife is very sharp.

Place your lid to one side on a drying rack and place the rest of your loaf on another rack. Leave to dry.

pain surprise preparing the loaf
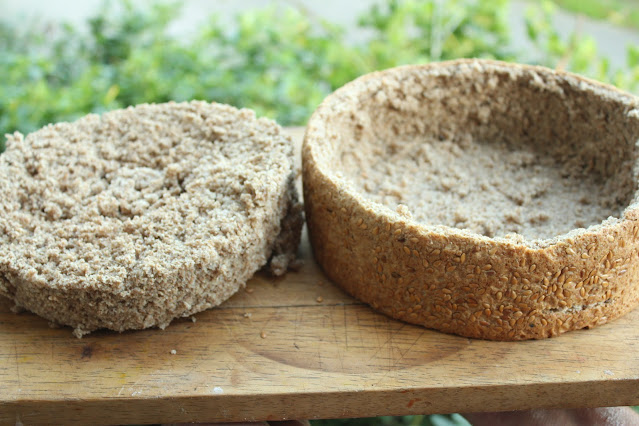
The object now is to remove the whole of the inner cylinder of bread aka crumb, whilst leaving the base and side crusts intact.

When your loaf is dry to the touch, take a sharp knife and make an incision all the way down and around the loaf 'crumb' at ½ " or 1cm from the side, making sure not to pierce the bottom crust of the loaf.

Pierce the crust with a sharp thin knife, at ½ " or 1cm from the bottom of the loaf, making an incision wide enough to take your bread knife. Insert the bread knife and carefully, with a sawing motion, angle the knife through the incision to slice through and along the bottom of the loaf, making sure not to pierce the crust nor make the original incision any larger. You may need to reverse the knife to cut out an exact circle. Or you could make two incisions and cut both ways to avoid leaving some of the crumb behind.

Pain surprise cutting around the crumbthe crumb


Use your fingers to remove the bread cylinder aka crumb.

Pain surprise removing the crumb

Place the crumb in the freezer - this will make it much easier to slice.


Making the Sandwiches

Remove the crumb from the freezer.

Using a sharp knife and with the crumb placed on its side, carefully split it into an even number of slices.

You can make these as thin or as thick as you like. Thicker is easier! You may even find it simpler, depending on the depth of the crumb to make just one row of sandwiches - doorstops as they are called where I come from.

Pain surprise making the sandwiches


Make your sandwiches from your filling and two rounds of bread - my fillings are green and orange - traditional Halloween colours.

Cut each round of sandwiches into triangles.

If your bread is really crumbly, then an alternative way is to cut the sandwich triangles first and then split them afterwards.


Pain Surprise

Pain surprise filling the crust

Place the first circle of sandwiches slightly at an angle back into the crust container, so that the filling is showing.

Add the creepy ingredient.

Continue onto the next layer, sandwiches and crawlies, until the Pain Surprise is full.

Pain surprise with organic mealworms


Place the crust lid on top and tie with a ribbon.

Add Halloween decoration.

Prepare a few days in advance for a better effect at the reveal.

Pain surprise with organic mealworms
Place the Pain Surprise in an aquarium or similar glass bowl with a lid so as to avoid any escapes.

Thanks for dropping by and do feel free to share experiences or ask for further information in the comment section. If you have enjoyed this piece and found it useful think about sharing it with your family and friends, on social media and also maybe about joining this blog and/or subscribing to my YoutubeOdysee  or BitChute Channel or even supporting us on Patreon or

It all helps to keep me going!


Until next time, all the very best from sunny Normandie! 

Sue

One of my coturnix quail has gone broody and is sitting. A Fred and Ginger production!

You know how it is, you've been hoping and planning for an event and just as you finally start to get ready for action, your poultry decide they've waited long enough for an outcome and take charge.

Organic Coturnix quail nesting
Fred and his best friend Dorothy keeping guard whilst Ginger is laying.

Well, a couple of weeks ago I started reading about fatal genes in the Golden quail.  There is a lot of conflicting  information because well it's genetics and thus exceedingly complicated. Even the nomenclature 'Golden' quail is somewhat controversial, in French these quail are know as Isabelle but in English there are two recognised type of golden quail - the Italian and the Manchurian. You will read in some papers and articles that it is the latter or the former that carry the fatal gene. This however, is further complicated by the fact that some articles I've read, insist that the Italian and Manchurian quail are one and the same! In my experience with purchased hatching eggs and through talking to other quail keepers, it is certainly true here, that all Golden quail seem very frail and have poor hatch and survival rates. My golden quail I've had now for three years from hatch and although they wouldn't get any prizes from purists, as all the feathers are patterned differently, they are gold and they are healthy.

Organic golden coturnix quail hatching


However, not to tempt fate nor F.B. Hutt et al, I have decided to steer away from crossing gold with gold of any sort. In France this makes even more sense, as the Isabelle are said to have been raised from a very small gene pool, just 20 original eggs brought in from Portugal. Thus on top of the fatal gene issue, we have consanguinity to add to and exacerbate the problem.

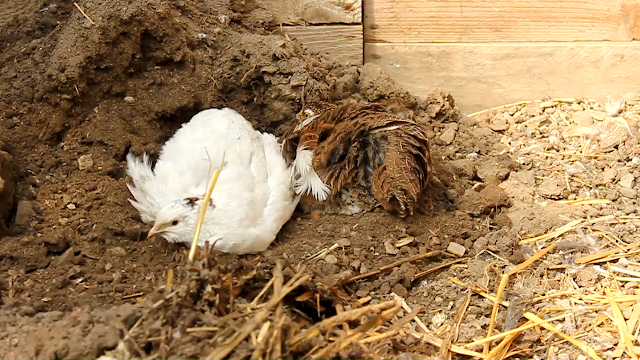
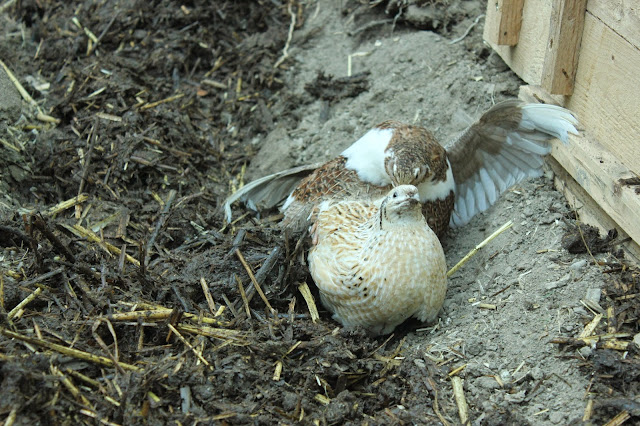
Organic English White and Tuxedo Coturnix Quail dustbathing

Some two weeks ago on a visit to our local organic dairy farm to collect our milk and where they keep quail, I asked if they had an English White or Range or any other colour other than gold to sell me. In fact they had a lovely Tuxedo, which I instantly wanted but could not have, as he was their only example of the colour. So I asked to borrow him for a week. In the event and just in case there was some friction between my quail and Fred, I brought his friend with him. This English White quail was of undetermined sex but I called 'her' Dorothy after Dorothy Lamour because she had a heart shaped pattern on the back of her neck. This complicated things rather as I always felt she was keeping a beady eye on Fred and perhaps rather cramping his style!

Organic domestic coturnix quail nest
One of last year's nests under the rosemary

In my reading around the subject of wild quail because this is the way I am sure I will get the happiest and healthiest creatures, I found that the female is drawn to start nesting by hearing the male cry. Apocryphal or not, last year when I had a male quail, my female quail made nests. This year when they started laying in early April, they were just laying in a random, devil-may-care sort of way, single eggs in different places each day. However, the day after Fred arrived I noticed one of my golden quail hiding behind the pallet wood vertical garden shelving in the greenhouse and I noticed her return there the next day too. On the following day I investigated and found three eggs in a row, it is a really tight squeeze in there, so every time she got up from laying she left the eggs in a rather haphazard way. However, on subsequent days I noticed she would gather them together before she laid and that she was going back in there, during the day, seemingly both to check on the eggs and to turn them too. This quail I now named Ginger, for obvious reasons.

Organic Golden Coturnix quail sitting eggs

I was now getting very excited, Ginger had laid six eggs in all but Fred was destined to go back to the farm the very next day when we went for the milk. From all I have read, I am still not totally sure how important the male is, nor exactly sure if he is involved in sitting. As wild quail, are  very private, shy birds, there is no great body of research on their behaviours. They do actually have wild quail on the farm but assure me they have never seen two birds together on a nest but my belief is, from watching Fred, that in the early stages of nesting even if the male does not sit he is very near by. According to a paper I read on the subject; Nesting and Parental Behavior in Domestic Common Quail, Orcutt and Orcutt (1976), the male sits within 30cms of the nest for at least the laying of the eggs and for some part of the sitting. This was true of Fred as you can see from the photograph above (top) and the film. So I decided to ask to borrow Fred for another week, just in case Ginger decided to sit. In the event Ginger started to sit that very same day.

Organic coturnix quail mating

I was really worried now, as it meant I would have to leave Ginger outside in the greenhouse all night rather than put her away with the others in their little wooden house. We have a variety of predators here but the worst for quail are rats, which although I shouldn't say it, I have not seen for several years. We also had a weasel here quite recently but I was hoping that Ginger was well enough hidden. I placed a board in front of her at night and a couple of bricks along the front of the greenhouse door where there was a slight gap. How happy I was the next morning to see her still sitting and in good health!

Organic Golden Coturnix quail eating weeds

With regards to how often she comes off the nest, this is rather a vexed question as the first day I did not see her move at all and I was, as you can imagine, rather a fixture in the greenhouse. One thing I noticed over the next few days though, was a complete change in attitude towards Fred. She became progressively more and more aggressive towards him and for that matter most of the other quail. She did not however, exhibit that 'puffed up' and erratic scratching of the classic broody hen. Orcutt and Orcutt on the subject write that their male had feathers missing from his head by the 5th day of incubation! Conversely however, she became more accepting of me and finally by the 4th day of incubation actually came from the nest and out to meet me at the greenhouse door when I was feeding the poultry in the morning.

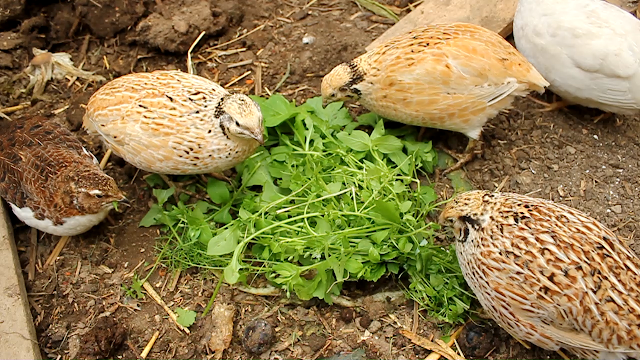
A group of organic coturnix quail eating chickweed
Fred caught snacking again with friends

I also read in the Orcutt article, that they actually had to remove their male from the breeding pen, as he was showing less interest in the nest and he was being attacked. I did however, wonder at this behaviour from Ginger. She was particularly aggressive towards Fred when she saw him around the food bowl in the morning and I did wonder if she really wanted him to be guarding the nest or even sitting. In an Experimental Study of Nesting by Coturnix Quail, Vernon C. Stevens, The Journal of Wildlife Management, (1961) the author seems to indicate a more proactive role for the male. However, I was rather hoping Fred would not be that important to Ginger, as by the next weekend he would have to go back to the farm!

Organic Cochin hen sitting quail eggs

So here I am with my design for a secure quail breeding area still in the workshop and Ginger already sitting and on her 6th day of incubation. Fred is still in the dog house and Dorothy possibly quite happy about it. Whatever happens, I have backup in the form of my little Cochin Snow Queen who is already sitting on some of the other quail eggs, which I am hoping are fertile by Fred too. If Ginger gives up then I will transfer the eggs to her.

Organic Golden Quail feeding from a compost bin

One of my most important precautions for Ginger though,  is in nutritional support. As you can see in the photos, now they are laying, I have been stocking up the greenhouse with compost and keeping the large compost  bins closed as the chicks have had their share. This is, however, part of my Spring schedule, spreading compost in order to get the greenhouse ready for planting. As our principal compost bins are chock full of arthropods, I have set up a 'holding bin'  actually in the greenhouse and Ginger gets the first pick of this every morning. I am hoping all the methionine and the B complex vitamins this food will provide,  will keep her stress levels down to a minimum and save Fred from a few plucked feathers.

Part Two the update is here 

Fingers crossed... and now if you'd like to sit back and watch the film:


Fred snacking again this time on a courgette/zucchini.
Organic Tuxedo Coturnix Quail eating a courgette/zucchiniThanks for dropping by and if you have enjoyed this piece and found it useful think about sharing it and also maybe about joining this blog. Please also feel free to ask questions or make comments in the section below.

All the very best,
Sue


RETURN TO CONTENTS PAGE  
©  Sue Cross 2015